For the past couple of years, I’ve had a membership at Golf Lab CT, and honestly, I’ve loved training there. They have a Trackman, which is an absolute luxury when it comes to getting accurate data on your swing and ball flight. The facility is top-notch, and I’ve learned so much about my game there. But as anyone with kids knows, life has a way of making even the best intentions difficult. Between kids’ sports schedules, family activities, and all the other commitments that come with parenting, it’s gotten harder and harder to make the trek to Golf Lab as often as I’d like. That’s when I started seriously considering building a golf simulator in my own basement.
My goal is to keep the total project cost under $10,000. That’s an ambitious target, but with smart shopping—especially taking advantage of Black Friday deals—and careful planning, I think it’s achievable. The current estimate puts me at around $5,700, which leaves some room for upgrades. I’m considering adding a secondary TV mounted on the side wall to display slow-motion impact video and potentially adding swing cameras to capture my form from multiple angles. These would be great additions for detailed swing analysis, but they’ll depend on how the budget shakes out.
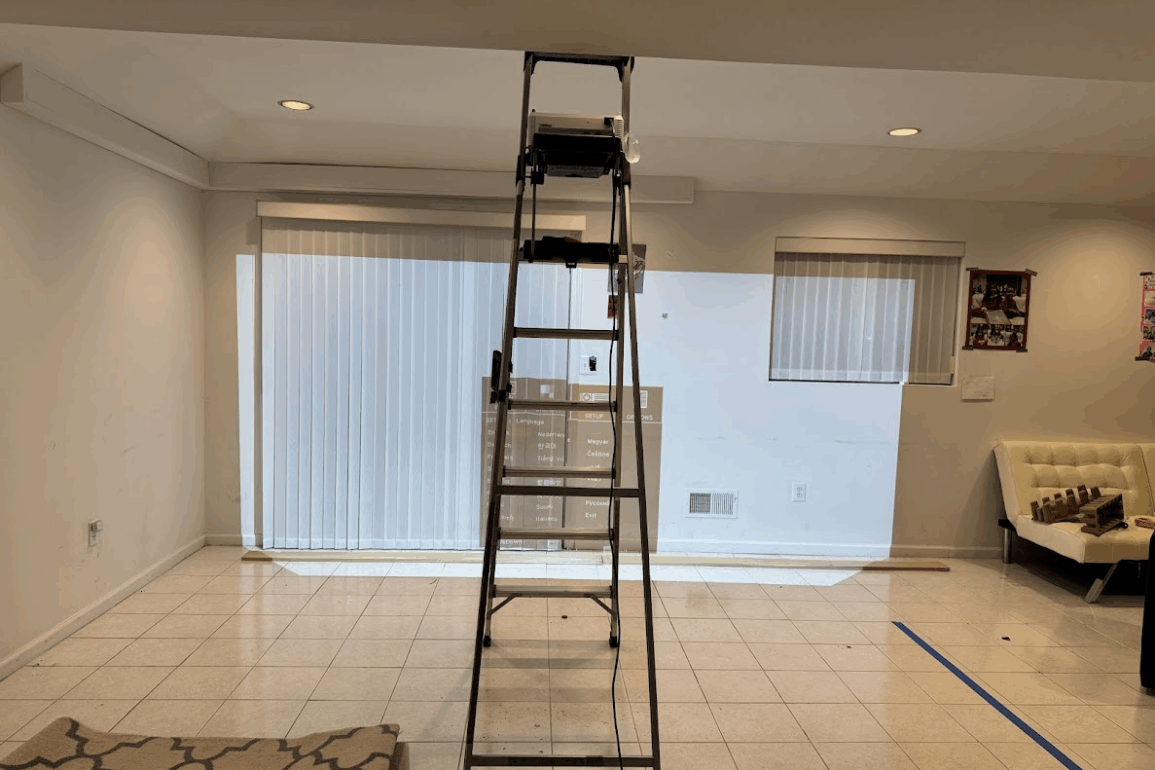
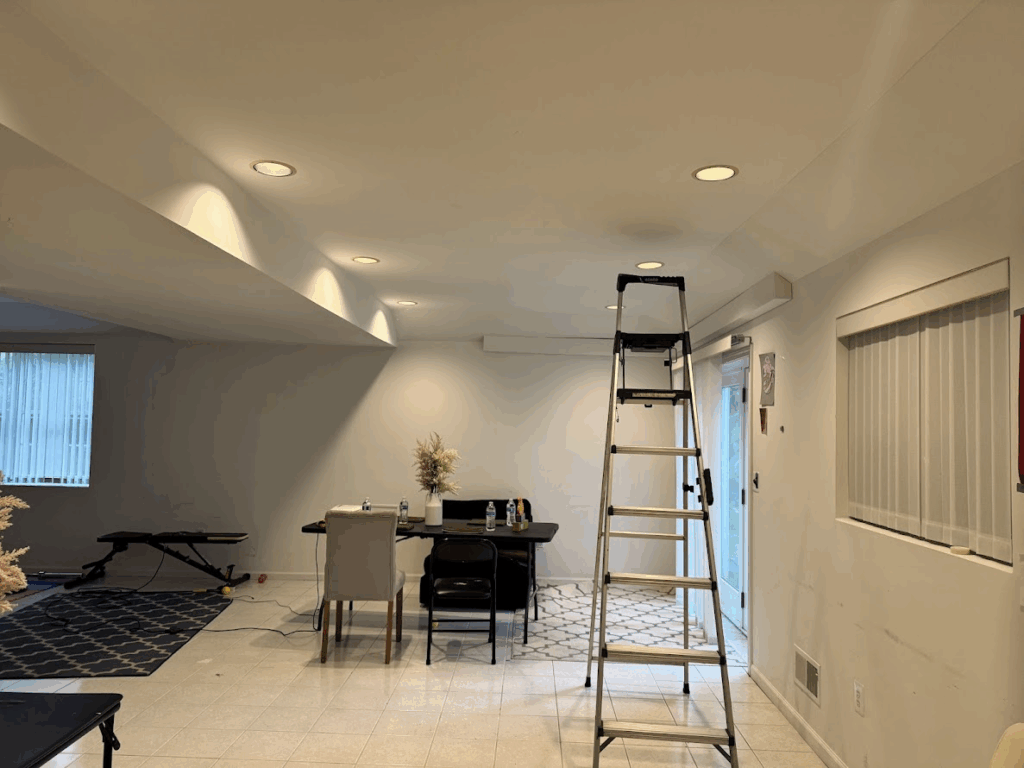
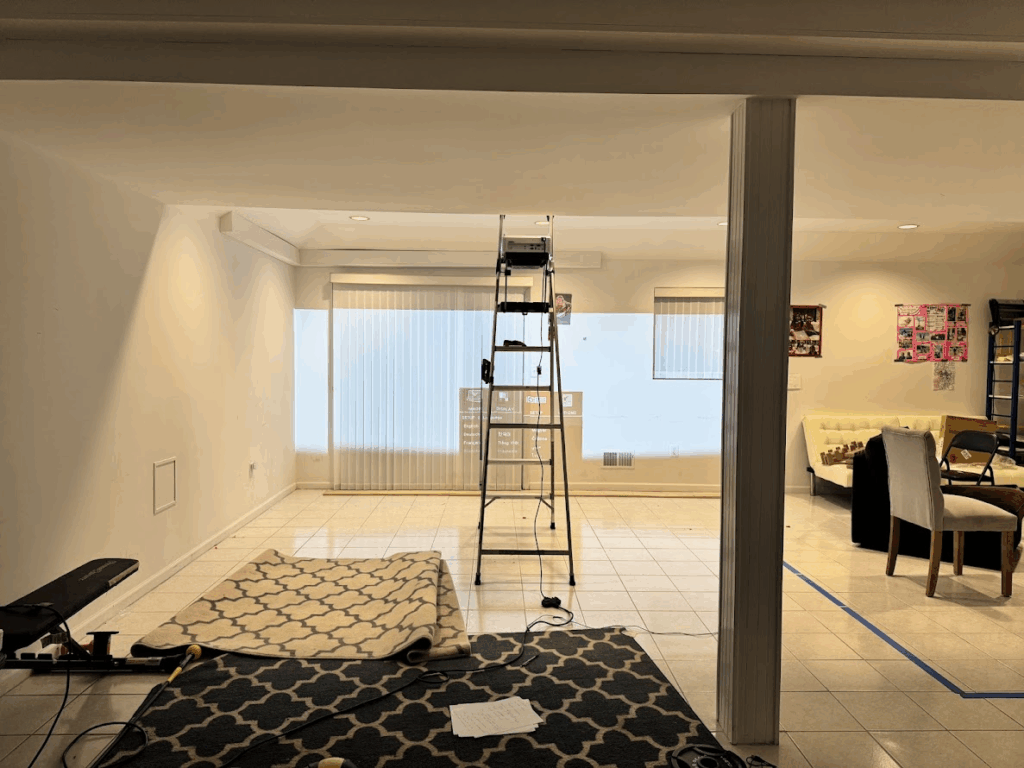
I’m fortunate to have a spacious basement room with tile floors, recessed lighting, and plenty of open area. The room features large windows with vertical blinds and flows into a dining area, which actually gives me some flexibility in positioning the simulator. The ceilings are 9 feet high, which sounds great for a golf simulator—except there’s a catch. There’s a soffit running right through the middle of the basement that drops the height down to just 7 feet. You can see it clearly in the photos, and it’s going to be a real challenge to work around. That soffit runs right through what would ideally be the hitting area, creating a ceiling height restriction exactly where I need maximum clearance for the top of my swing. I’m still strategizing on the best way to handle this, whether that means positioning the hitting mat in a specific spot or getting creative with the overall layout.
My primary goal with this simulator isn’t just to hit bombs with the driver—though that’ll be fun too. What I really need is realistic data, especially for my short game. My scoring zone from 25 yards to the pin is where I lose the most strokes, and I need to be able to practice those chips, pitches, and partial wedge shots with accurate feedback. That means I need significant distance from the hitting area to the screen to allow for proper ball flight physics. I’m planning on getting the Uneekor Eye Mini Lite as my launch monitor, along with a budget gaming PC to run the simulation software. While it’s not a Trackman like they have at Golf Lab, the Eye Mini Lite should give me excellent data for the price point, and that’s really what this whole project is about—getting quality feedback on every shot so I can actually improve.
Equipment Purchased So Far
| Item | Price |
|---|---|
| ViewSonic PS502W 4000 Lumens WXGA Short Throw Projector | $616.82 |
| Ezcasch Ceiling Curtain Track Set – Dual Track 14ft | $164.83 |
| Curved Ceiling Curtain Track 21-24ft | $214.79 |
| Golf Impact Screen 9×13 with Upgraded Grommet Slings | $180.78 |
| Joydeco Blackout Curtains 96 Inch – 2 Panels | $187.12 |
| 0.75″ × 6″ × 13ft Backing Board for Impact Screen | $45.00 |
| 1ft Backing Board for Projector Flush Mount | $15.00 |
| Screws and Hardware | $25.00 |
| Running Total | $1,449.34 |
The ViewSonic short throw projector was a carefully considered choice. In a basement with limited space and that problematic soffit, I needed a projector that could be mounted relatively close to the screen while still producing a large, bright image. Short throw projectors have a much wider angle lens, which means I can mount it just a few feet from the screen and still get a full-size projection. The 4000 lumens is also important because even with blackout curtains, basements often have ambient light from recessed fixtures, and I wanted to ensure the image stays crisp and visible during practice sessions. The WXGA resolution is perfectly adequate for golf simulation software, and the price point was reasonable compared to standard throw projectors that would have required mounting much further back—space I simply don’t have.
The dual curtain track system will create an enclosed hitting bay that serves multiple purposes: blocking ambient light for better screen visibility, containing any errant shots, and creating a more immersive practice environment. I’ve also got blackout curtains that will hang from these tracks to ensure the space is properly darkened.
I still have a lot of work ahead of me. Beyond installing the launch monitor and gaming PC, I need to set up the hitting mat and turf, mount all the hardware, and get everything calibrated and dialed in. I’m also excited about adding a putting strip to work on distance control—that’s another weak area of my game that I can really improve on with daily access to quality practice space. The ability to roll putts from various distances and get immediate feedback on my stroke and speed control is going to be invaluable.
Estimated Additional Costs
I’m planning to pick up more supplies on Black Friday to hopefully catch some deals. Here’s what’s still on the shopping list:
| Item | Estimated Price |
|---|---|
| Uneekor Eye Mini Lite Launch Monitor | $2,000.00 |
| Dell Tower Desktop (Intel Core Ultra 7, RTX 5060, 16GB RAM) | $1,149.99 |
| SigPro Softy Hitting Strip | $250.00 |
| ProsourceFit Puzzle Exercise Mat – 48 sq ft (×10 packs for floor & ceiling) | $499.90 |
| Home Depot Putting Green Turf 6ft × 38ft | $380.00 |
| Additional Costs Subtotal | $4,279.89 |
For the flooring, I’m planning to line the bottom and top of the 16-foot by 14-foot hitting area with black gym tiles. The ProsourceFit puzzle mats come in packs that cover 48 square feet each, so I’ll need about 5 packs to properly cover the 224 square feet on the floor, and another 5 packs for the ceiling. This dual-layer protection is crucial—the floor tiles will provide cushioning and protect the concrete, while the ceiling tiles will protect the soffit and ceiling from any errant shots that go high. Golf balls can do serious damage to drywall and HVAC runs, so having that padded protection overhead is just as important as having it underfoot. On top of the floor tiles, I’ll be covering everything with soft artificial turf cut to size—this will give me a realistic feel for full shots and provide a proper surface for the hitting mat to sit on.
One detail I’m still working through is getting the turf and putting strip flush with the SigPro Softy hitting strip, which is 2⅝ inches thick. I might need to add rigid foam insulation board underneath the turf and putting green areas to build them up to the same height. This will create a seamless transition between surfaces and prevent any tripping hazards or awkward height differences when moving around the hitting area.
Total Estimated Project Cost: $5,729.23
This is very much a work in progress, but I’m genuinely excited about where this is headed. The ability to practice daily, regardless of weather or schedule constraints, and get accurate data on every shot is going to be a game-changer. More updates coming soon as the build progresses!
What do you think? Have you built a golf simulator, or are you considering one? What challenges have you faced? Drop a comment below!

David is an avid golfer who loves walking Connecticut’s courses and playing alongside his family. He’s passionate about golf course architecture and one day hopes to play at Pebble Beach.